Bret Edge shares the last part of his multi-part series on adventure photography while overlanding and in the outdoors
There you are, standing at the top of a mountain pass while your hiking companions slowly ascend the rocky trail that will soon deliver them to you. Below them, in a cirque, rests a shockingly blue alpine lake. Jagged peaks punctuate the horizon while wearing white crowns of cotton ball clouds. You compose the scene through your camera’s viewfinder, press the shutter, and forever record this most incredible moment in time. This is the essence of adventure photography.
Since you’re reading this article, you’re probably no stranger to outdoor adventures (or, sometimes, misadventures). I had been an avid hiker and backpacker for ten years before I first picked up a camera with any real intent to produce photographs that were something more than a simple snapshot. At that time, I was only interested in photographing the landscape. To me, photos with people in them were great for reminiscing at a later date but not for eliciting “oohs” and “aahs” from friends and family.
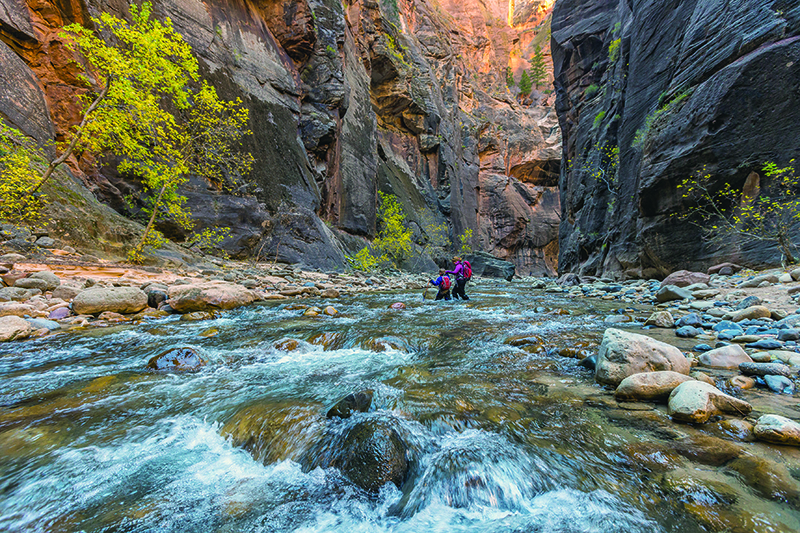
A mother and her toddler son crossing the Virgin River on an autumn hike of the Narrows in Zion National Park, Utah.
As it turns out, a person viewing a photograph of other people immersed in a great outdoors adventure is more likely to develop an emotional connection with the image than if they were viewing a photograph depicting only a stunning landscape. In other words, they want to be there, in the image, doing the things shown in the photograph. And that is exactly what I want my friends and family to feel when they see images from my own adventures.
How do you do this? How do you create photographs that might inspire someone to embark upon their own adventure? Honestly, it isn’t that difficult. You’re probably already doing the hardest part — getting out there. Now you just need to learn and apply a few tips to help elevate your work from snapshots to honest-to-goodness adventure photography.

Keep Your Camera Handy
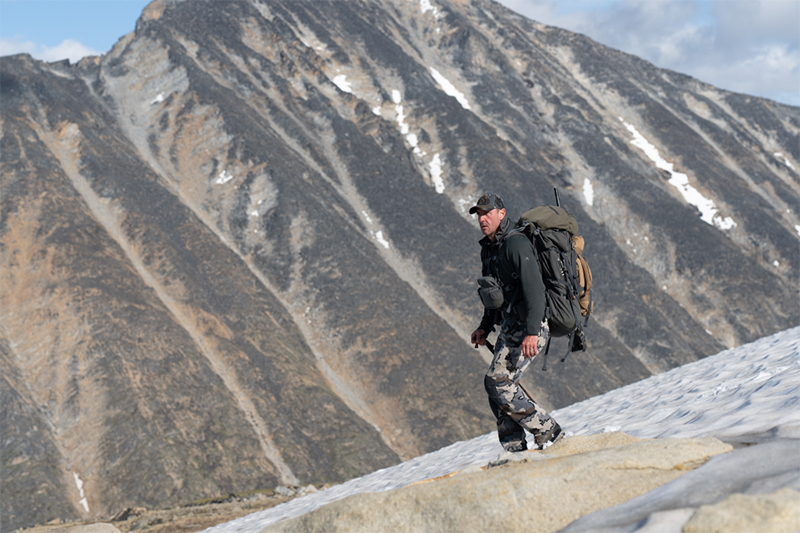
Lugging a camera up a 14,000’ peak won’t do you any good if it’s buried deep in your pack. I wear a chest pack that holds my camera with an attached lens (usually a 24-70mm lens), which gives me almost instant access to my gear. If you carry a point and shoot camera, try a small, padded pouch that attaches to the hip belt or shoulder strap of your backpack. The point is, keep your camera where it is easily accessible so you’ll never miss a moment.
Be Authentic
The vast majority of successful adventure photographers specialize in the sports or activities in which they participate. Jimmy Chin shoots climbing expeditions, Krystle Wright shoots BASE jumpers and Ann Driggers shoots mountain bikers. They’re all athletes first, photographers second. They shoot the sports about which they are passionate. Nobody knows what fires up a rock climber/hiker/mountain biker more than a rock climber/hiker/mountain biker!
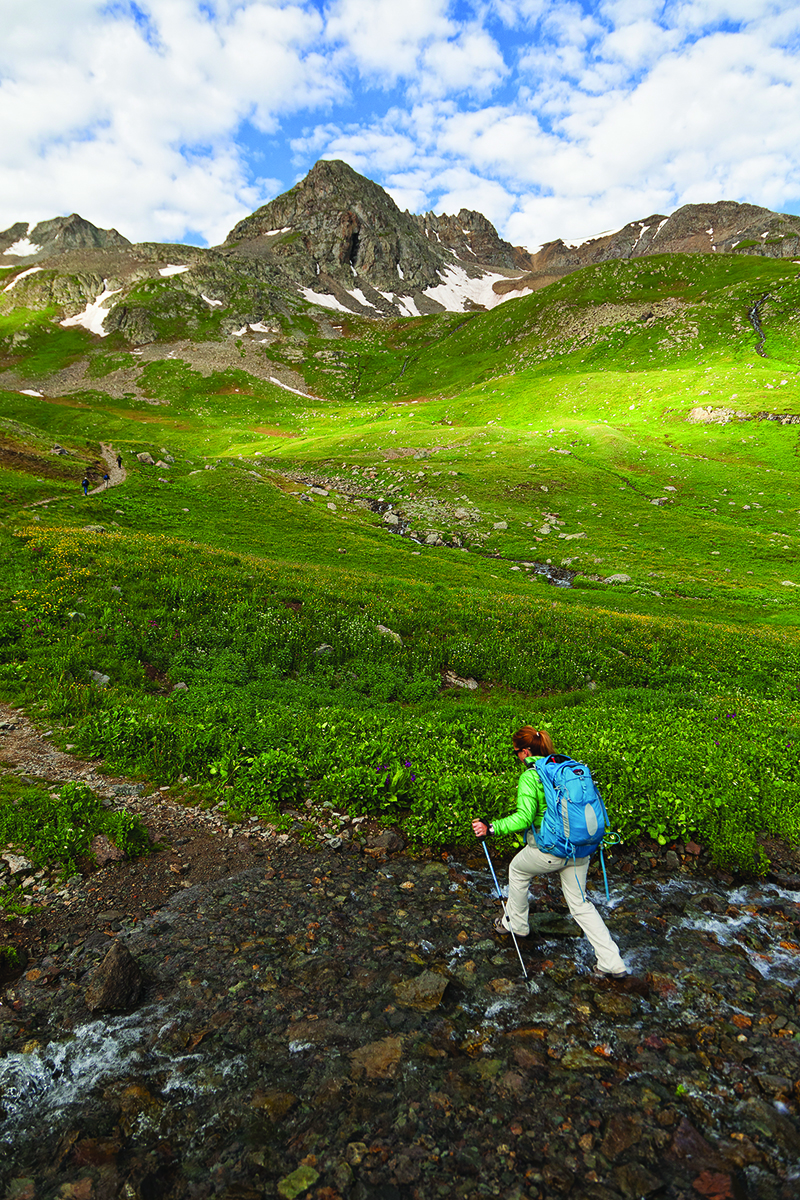
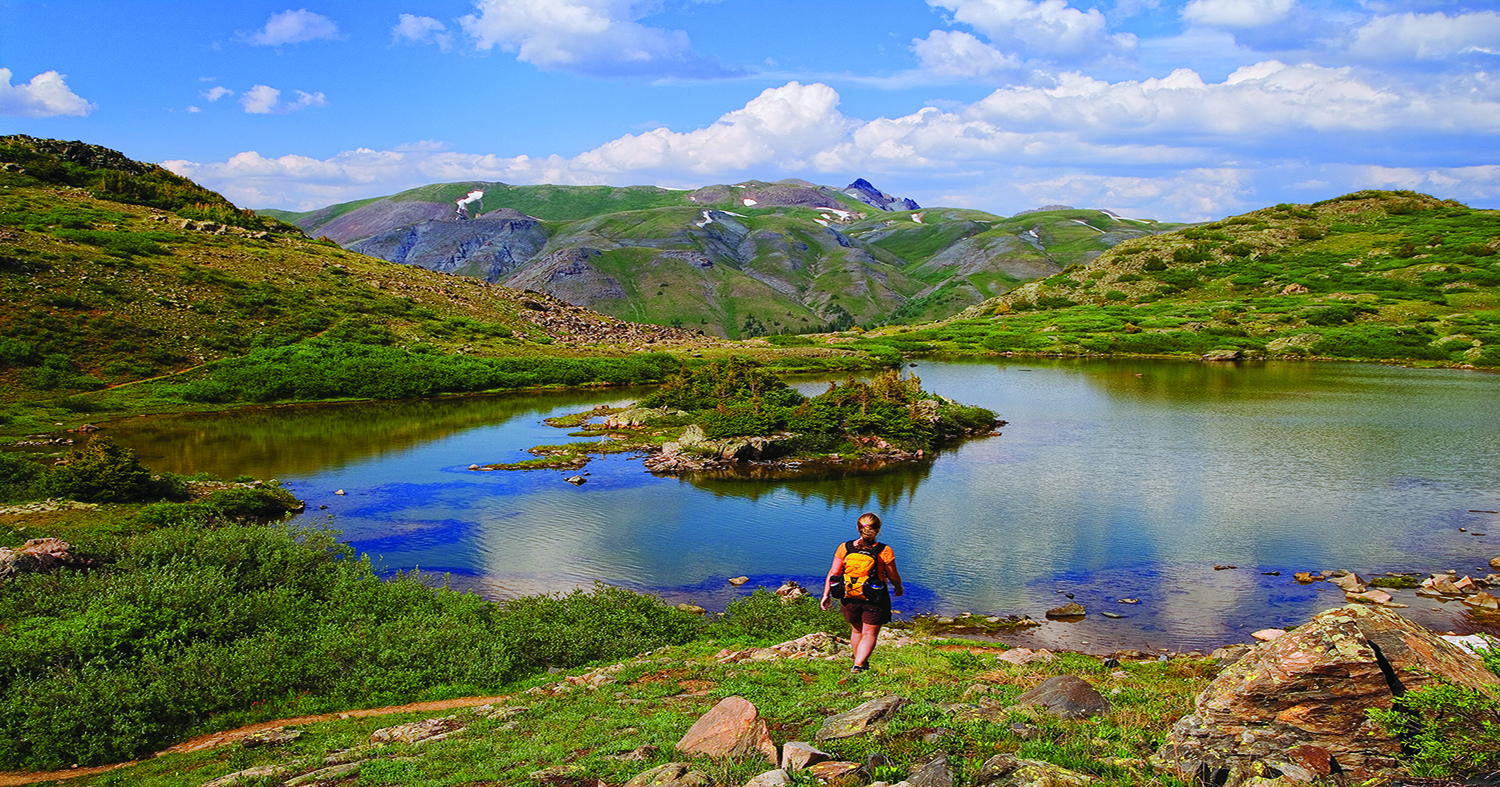
A female hiker with trekking poles crosses a creek in American Basin en route to the summit of Handies Peak in the San Juan Mountains of southwest Colorado.
Seek Out Interesting Moments
It could be a hiker negotiating a tricky scramble across an exposed ridge, a trail runner rock-hopping across a rushing stream, a mountain biker racing through a stand of aspens or a killer overland campsite surrounded by desert towers. Whatever “it” is, it should be a moment that inspires those viewing your image to want to drop everything they’re doing and head out for an adventure.
Photograph the Moments in Between the Interesting Moments
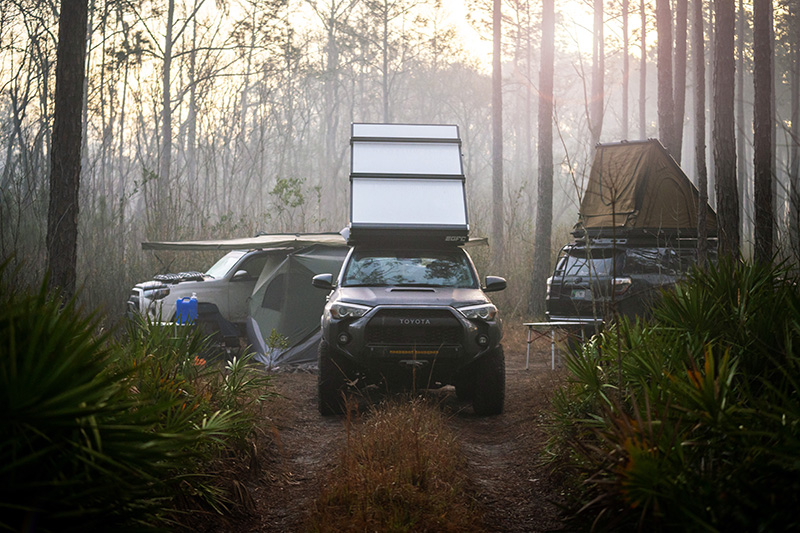
I know, I know…I just told you to seek out the interesting moments. While this is sound advice that will likely produce the most dramatic images from your adventures, a few images of quiet moments may fill in the gaps in your photographic essay. Consider this: What might you feel while viewing a photo of a backpacking tent in a meadow filled with wildflowers below a ring of mountain peaks? What about a worn-out hiker relaxing in a hammock at the edge of a crystal clear lake? I’ve seen these photos and every single time I’ve thought, “Man, I need to go there!” On one of our family backpacking trips in Colorado’s San Juan Mountains I awoke in the middle of the night to the sound of a marmot furiously chewing on the rubber handles of my son’s trekking pole. The next day I asked him to hold it up so I could photograph the damage, with his sweet, smiling face in the background. Of all the images I made on the trip, that photo consistently elicits the most emotional responses.
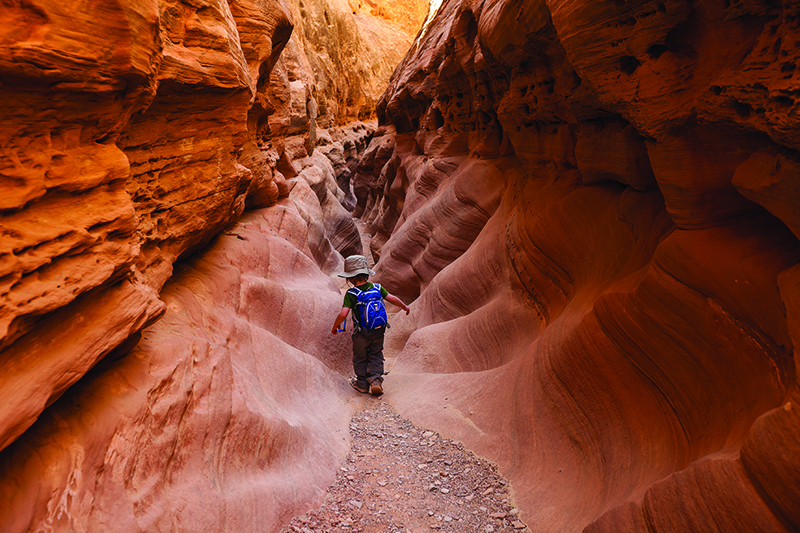
A young boy hikes through a narrow section of Little Wildhorse Canyon in the San Rafael Swell, Utah.
Vary the Camera Angle
If you shoot every image from a standing position your photos will all start to look the same. Worse yet, they’ll look a lot like everyone else’s photos since the vast majority of images are shot from head height, or somewhere between 5’ and 6’. I’ve been known to lie on my belly, scramble up to a precarious perch, and hold the camera less than an inch above a creek as the icy water rushes perilously close to my expensive digital camera. Why? Because the perspective afforded by these seemingly odd positions allows me to make unique photographs. Show your viewers a point of view they aren’t used to seeing and they’re immediately engaged.
Get Close to the Action with a Wide-Angle Lens
Using a wide-angle lens gives your adventure photography somewhat of a participatory mood. You’re typically, but not always, very close to your subject(s) and the wide field of view likely captures much of the surrounding landscape as well as your subject. Experiment with camera angles to learn which ones work well for you. For example, a very wide-angle lens mounted on a camera held only inches above the ground provides a dynamic view of a mountain biker ripping through a perfect section of singletrack. Alternatively, find a position on a rock above a trail as a hiker walks below and use a wide-angle lens to include the hiker as a small point of interest within the frame, with a gorgeous landscape in the background.
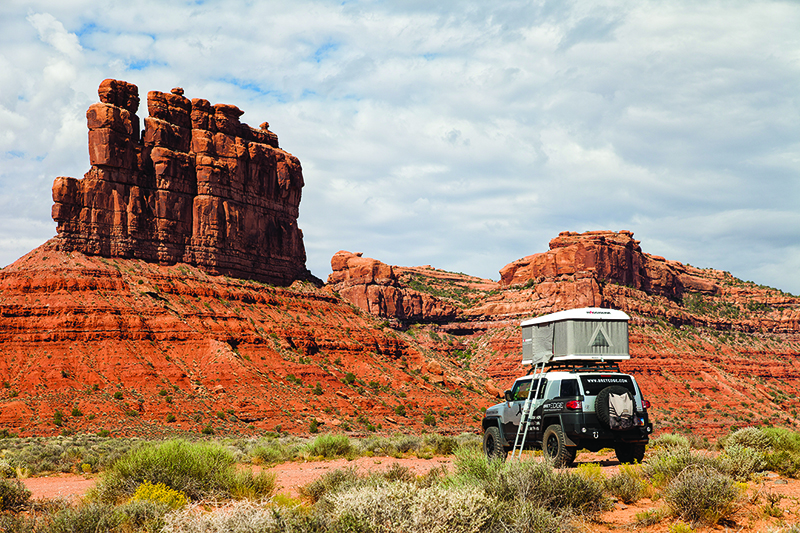
A Toyota FJ Cruiser with a Maggiolina rooftop tent deployed at camp in Valley of the Gods, Utah.
Use a Telephoto Lens to Isolate the Action
Another technique I like to employ is using a telephoto lens set to a large aperture to isolate my subject against a blurred background. Using a longer focal length also compresses the apparent distance between your subject and the background. This “trick” is commonly used to give distant landforms, i.e. mountains, the appearance of towering over your main subject. This is a popular technique for trail running and mountain biking but it can be used for nearly any outdoor activity.
Use Continuous Mode and Stock Up on Memory
Unless you’re photographing a static scene you’ll find the most success using continuous mode, which allows you to shoot several frames in very quick succession. This is helpful when you’re photographing a moving subject as it is quite difficult to release the shutter at just the right time to capture the perfect pose or moment. Continuous mode is a memory hog so you’ll want to be sure to carry sufficient memory to record all the action. I usually travel with around 100 GB of memory cards to ensure that I never run out of storage space.
Keeping these tips in mind should help you to create even more incredible images on your next outdoor adventure. The only thing left to do is pick an awesome location, pack up your camera gear and hit the road…or trail!

Editor Note: Bret has recently launched eFotoGuide which is an exceptional resource for photographing National Parks throughout the United States. Visit his website at efotoguide.com and follow his blog for additional photography tips. You can also read Parts 1 and 2 of this series by visiting the following links:
Documenting Your Adventure Part II
Documenting Your Adventure Part I
OutdoorX4 Magazine – Promoting responsible vehicle-based adventure travel and outdoors adventure