Dual battery systems and how they benefit your overland vehicle
It is safe to say that anyone reading this likes to venture into the backcountry from time to time, or is planning to do so at some point. You may already be preparing for these adventures by adding accessories to your vehicle that will make your trip more comfortable or enjoyable. These accessories could include a portable fridge, additional lighting, CB and/or Ham radios, air compressors, winches, etc. The list goes on and on. What do all these accessories have in common? They need a power source.
In Issue 20 of OutdoorX4, Brian Wurts of Overland Solar provided an overview on the various types of batteries to power your vehicle-based adventures and let’s be honest: Having additional accessories can enhance and maximize functionality and self-sufficiency while traveling, until your one and only battery source dies…in the backcountry… by yourself. At the very least, a dead battery is a major inconvenience. At the most, it can make for a dangerous situation.
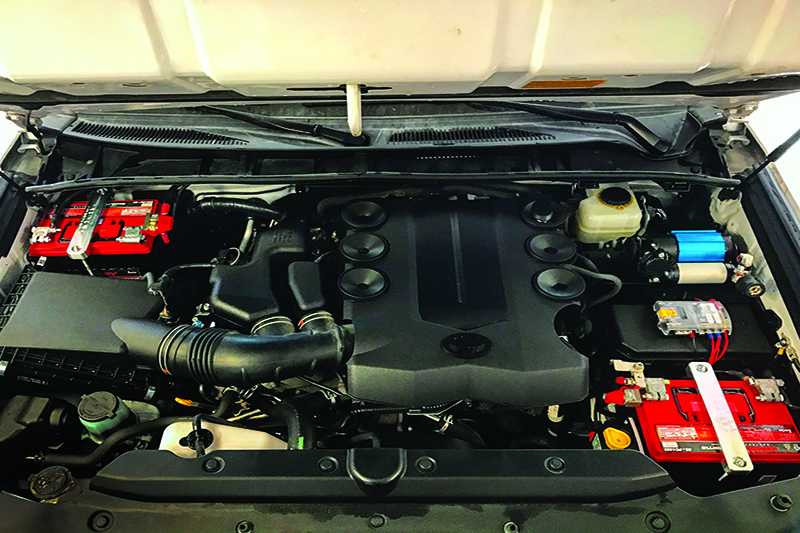
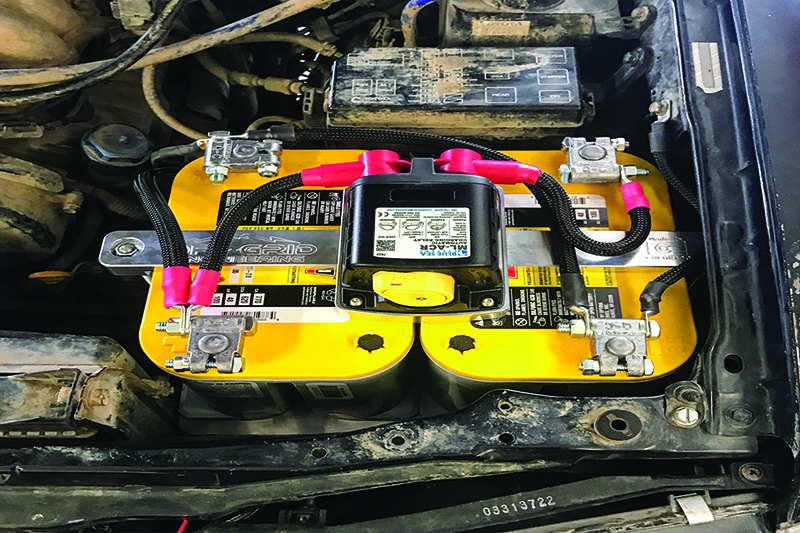
An example of a dual battery system cleanly laid out by utilizing the vehicle’s open space under the hood.
Why do we choose to add all these fancy electronics without paying attention to what’s powering them? Simple oversight could be one reason. Another reason could be that designing and installing a proper power system isn’t really the most exciting upgrade.
Consider this: You wouldn’t head out on an epic road trip, off-road adventure, or overland adventure without a spare tire, would you? Of course not. Our tires take abuse in these situations and losing one would mean the end of the trip. In a similar way, after adding multiple accessories to your battery, it is taxed as much as your tires are in off-road conditions.

So, what do we do about it? Enter the dual battery system. You hear a lot about it in the off-road and overland community. But what is it? How does it work? And, how do I know if I need one?
A dual battery system is exactly what it sounds like. It is an additional battery placed in the vehicle with the intended purpose of powering your auxiliary accessories. Simple enough, right? Not so fast. Now that we have two batteries, we must find a way to charge them with one charging source, your alternator. Read on as I explain the many ways of accomplishing this.
Another example with both batteries running parallel to each other.
The simplest form of a dual battery system is two batteries wired in parallel (negative to negative and positive to positive). Doing this effectively makes one large battery. Both batteries will charge together and discharge together. This doubles the available amperage and amp-hours (Ah) while keeping the voltage the same. It is a cheap and reliable way of increasing your available power. The downfall of this system is that, left unattended, any accessory tied to either battery can totally drain both batteries, which is not the most ideal feature for extended backcountry trips.
To combat this, we simply separate or isolate the batteries from each other when the vehicle is not running, or a charging source is not available. This way, we are free to drain one battery while the other remains unaffected. We do this via an inline switch, commonly referred to as a battery isolator, solenoid, or relay. This switch simply breaks the connection between the two batteries when isolation is desired. This allows us to choose which battery we are draining at any given time.
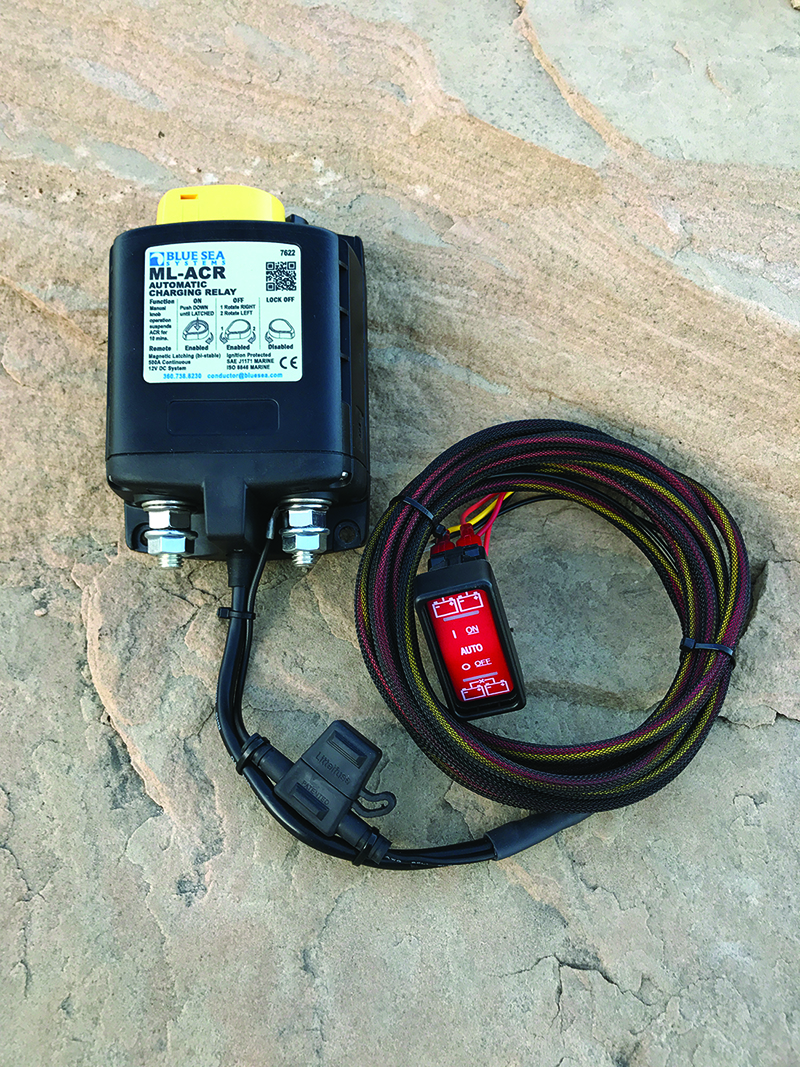
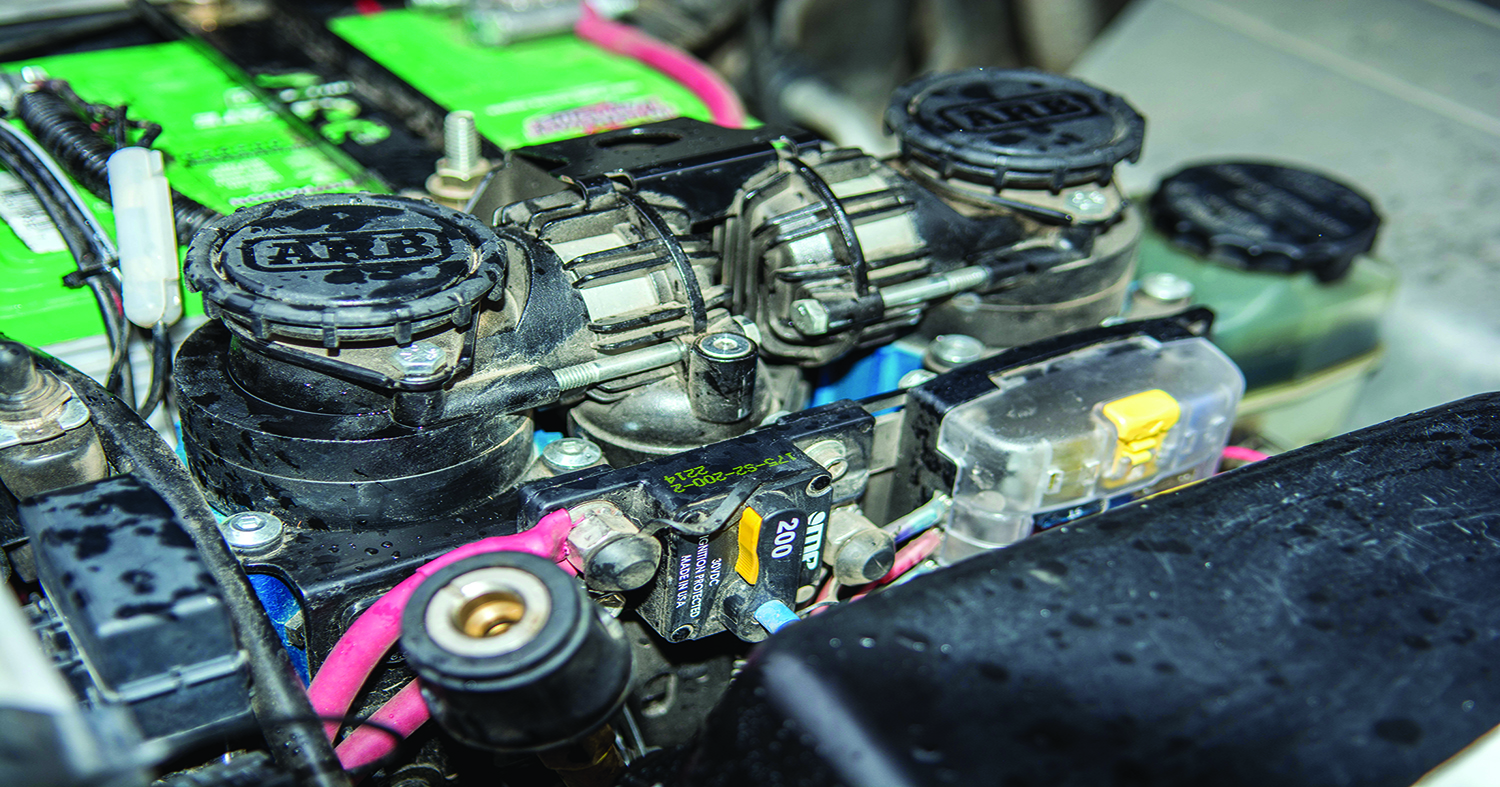
An example of a battery isolator and relay
These switches are available in many different forms. They range from simple marine-style dial switches that need to be turned on and off manually, to high amperage relays that need to be wired to your vehicle’s ignition, all the way to micro-processor-controlled “smart relays” that will automatically manage your battery system for you.
The most common form in years past has been the simple high amperage relay wired to an “ignition hot” source. This means that when the vehicle is running the batteries will be connected and thus charged together. When the vehicle is turned off, the relay will open, disconnecting the batteries from one another, and effectively “isolating” them from one another. Most dual battery systems operate this way, regardless of the style of relay you choose.

While this option is certainly cheap, simple, and effective, it is the 21st century and we don’t have to remember to turn switches any more, or have a degree in electrical engineering to install a battery system. Most modern systems will incorporate a “voltage-sensing smart relay.” These relays are simply placed between the paralleled batteries with no need to wire to the ignition. There, they sense fluctuations in voltage and are programmed to open and close the circuit depending on battery condition. If a charging source is present, such as the alternator when the engine is running, the smart relay will connect the two batteries so they can both charge together. If the smart relay senses a drop in voltage it will disconnect, thus isolating the batteries.
If you’ve been doing research and have seen a “Dual Voltage Sensing Smart Relay” advertised, this simply means the relay is capable of monitoring both sides of the battery system. Not only is it capable of connecting when there is a charging source on the main battery side (alternator), it will connect if there is a charging source detected on the auxiliary battery side, such as a solar panel. This style should be considered the standard for an overland-style build.
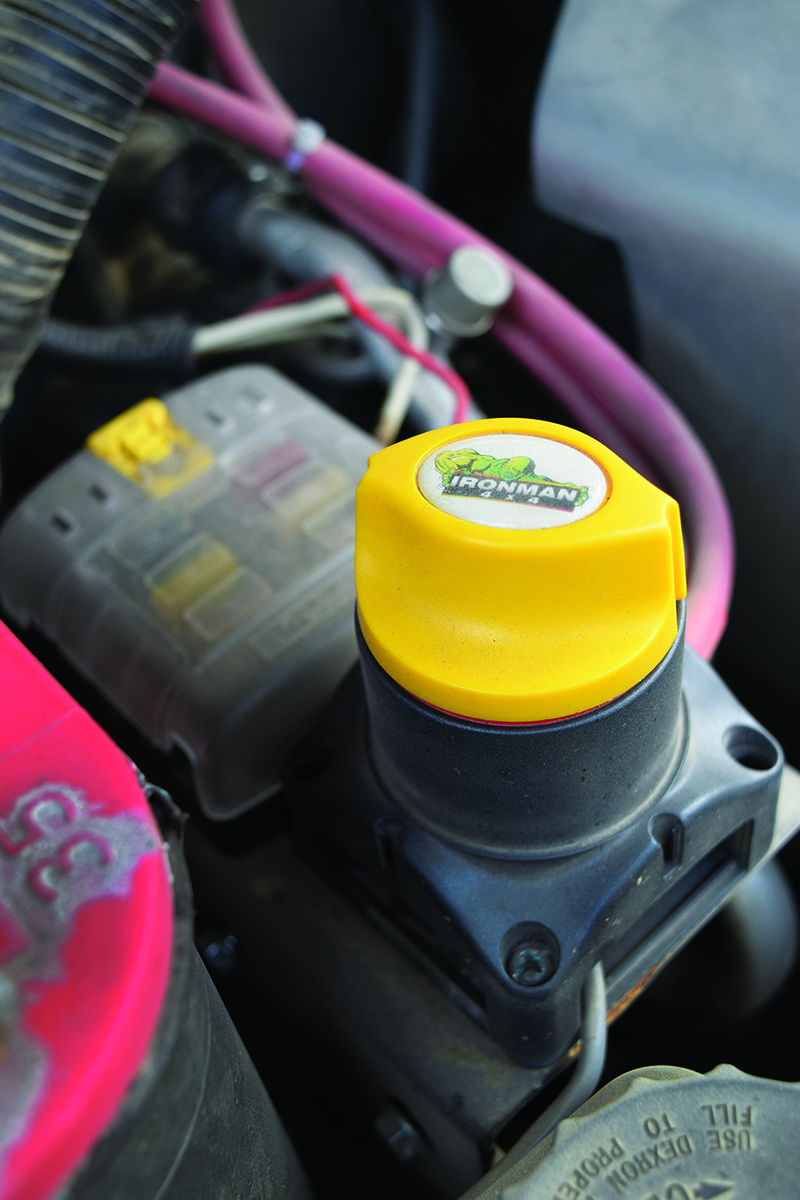
Ironman 4×4’s motorized dual battery isolator
Several of the switches and relays available, including the variety previously discussed, are available with manual override features. This means that you will be able to manually combine your batteries for high amp draw situations, such as winching, or even to jump start yourself from the comfort of your driver’s seat.
Enough about relays, let’s talk about the real work horses of the power system…the batteries! Since we are now charging two of them from one source, it is important that both batteries charge at the same relative rate. Otherwise, one battery may end up chronically undercharged or overcharged. Both scenarios can drastically reduce the battery’s life. How do we avoid this? Simple. Try to match your batteries as closely as possible regarding construction type, size, and age. The ideal scenario is to purchase two brand new, identical batteries when you are building your system. This can be a pricy endeavor, but it’s important to remember that properly matching your batteries will save you money in the long run. If buying two new batteries just isn’t in the budget, it is most important to match construction type.
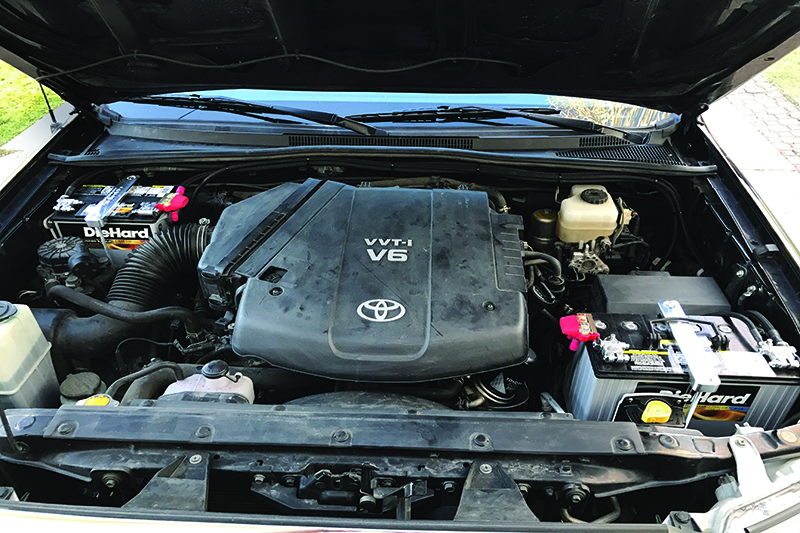
Like the other examples, this setup includes matching batteries to keep them at a similar charging rate.
As noted in Issue 20, there are three common battery types currently used for automotive applications: Flooded or “wet” cell, gel cell, and absorbent glass mat (AGM). Your vehicle most likely came from the factory with a wet cell and it is probably not well suited for this new task. AGM-style batteries are the most common recommended battery for the intended application here, mostly because of their durability and the fact that they are commonly available in the “dual-purpose” variety. A dual-purpose battery is designed to deliver enough energy to start a vehicle but also handle the abuse of “deep cycling” (repetitive discharge and recharge). Other benefits of AGM include the lack of necessary maintenance, resistance to vibration, and the ability to mount them in most any position. Two similar dual-purpose AGM batteries are considered the common standard for these types of set-ups.
Now, on to the system. How does it function once everything is selected and properly installed?
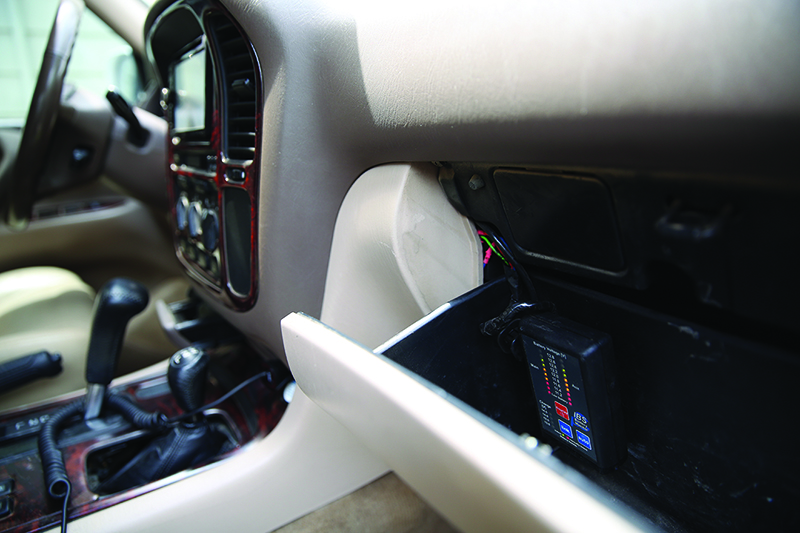
Some dual battery systems include a monitor to check system amperage including this one from IBS
In a typical dual battery system, the vehicle’s factory battery is designated as the “main” or “starting” battery, while the other is designated as the “auxiliary” or “house” battery. By keeping only the factory cables attached to the main battery and attaching ALL aftermarket accessories to the auxiliary battery, you can be certain that your camp lights or fridge do not affect your ability to start the vehicle when it’s time to break camp.
There is one more piece to the puzzle; circuit protection and distribution. This is how we get the power from the auxiliary battery to all the accessories. Sure, you could run each accessory’s power and ground wire directly to the auxiliary battery and hang an inline fuse off the terminal. This method is common but can become cluttered very quickly. Do it like the pros and use an auxiliary fuse box. They are cheap and easy to install. Using one of these will provide a level of organization that makes for a clean, reliable power system that is easy to troubleshoot should issues arise in the future.

On the topic of properly fused circuits, circuit breakers or fuses should be used on EVERY cable or wire that leaves either battery’s positive terminal. The only exception is the vehicle’s OEM cables.
That’s it! Two properly mounted batteries, a relay of your choice, quality cable, and proper circuit protection is a solid start to preparing your vehicle for extended backcountry travel. A properly designed power system is an essential part of any vehicle build, as the last thing you want sis to be in the middle of nowhere and have your battery die. Make it a priority to examine your power needs and plan accordingly before it becomes an issue on your next trip.
OutdoorX4 Magazine – Promoting responsible vehicle-based adventure travel and outdoors adventure