Staying unstuck while exploring off-pavement with a rear winch on your adventure vehicle
In the world of heavy construction and oil/gas exploration, pickups with rear-mounted winches are commonplace because they are great tools for pulling broken vehicles or equipment onto a trailer deck or winching without putting the pickup and driver in an awkward, and sometimes-dangerous, position.

Having a winch at the rear of a 4×4 is also handy in off-roading where there might not be a safe or easy way to get positioned head-on to a disabled vehicle or get your own truck out of a stuck without configuring snatch blocks and winch straps setup for a reverse pull from the front.
A winch hidden behind the rear bumper of your pickup can come in handy in some off-road and work applications.
Installing a rear-mounted planetary-type electric winch is fairly easy on full-size pickups where there’s a lot of open area between the rear crossmember and the rear bumper above the spare tire. A universal winch mount, or section of 6x2x1/4-inch steel U-channel, and basic fabrication skills are all that’s needed to install a rear-mounted hidden winch.
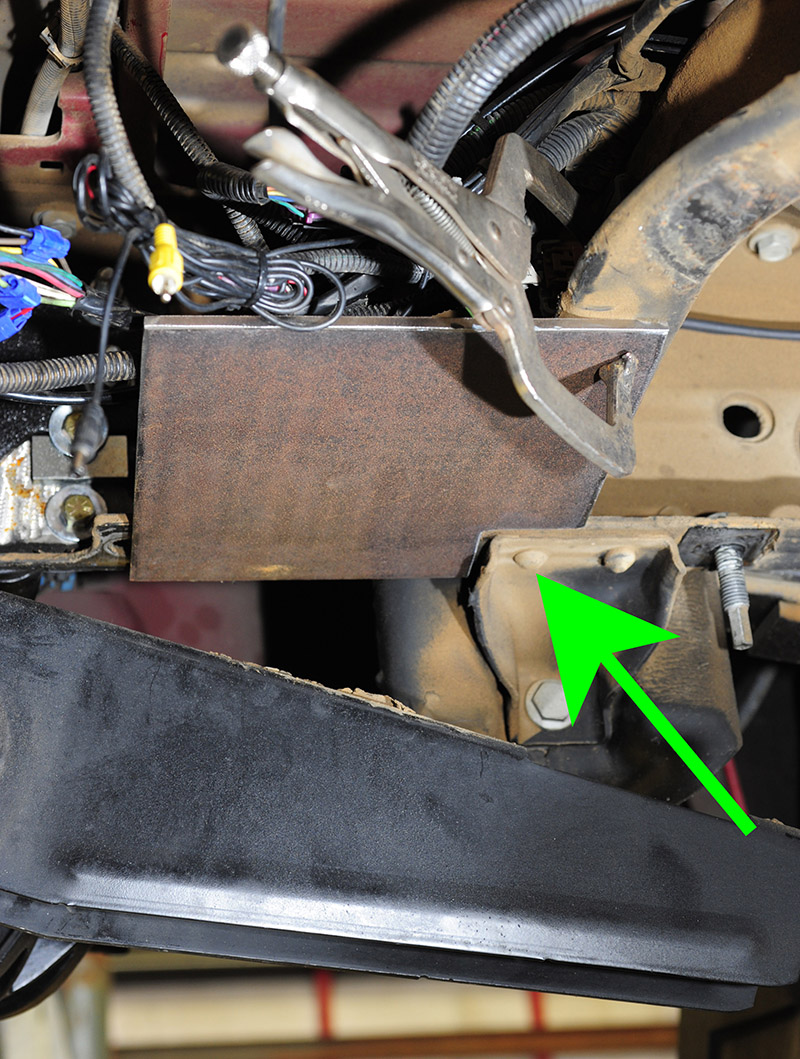
Remove the spare tire, loosen (don’t remove) the two bolts holding factory receiver hitch to the bumper step, then remove the two bolts on each side of the receiver frame brackets so the hitch can be dropped downward from frame rails to place the winch extension mounting plates.
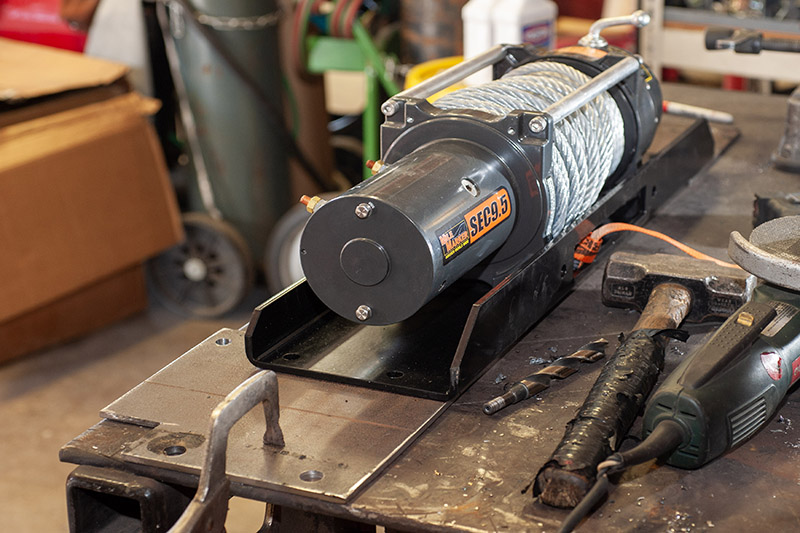
In this application we installed a Mile Marker SEC 9.5 winch behind the bumper of a Chevrolet 3500 4×4. But the process applies to a wide range of full-size pickup makes and models. The install took about three hours.
Measure, mark and fabricate two 9”x9” ¼-inch steel plates to extend the universal winch mount so it bolts to the frame rails utilizing the factory hitch mounting holes. Our install necessitated cutting a 2”x2” notch in “forward outer “corner of each plate to clear the spring hanger brackets.
They key to mounting a rear winch is using a universal winch mounting plate such as Mile Marker’s universal channel mount to save time on the fabrication process.
That allowed us to easily attach two 9x9x1/4-inch steel plates that serve as the extension brackets to hang the universal mount between the frame rails and the spare tire hanger crossmember. The plates are eventually bolted (sandwiched) between the factory hitch mounts and the truck’s frame rails.
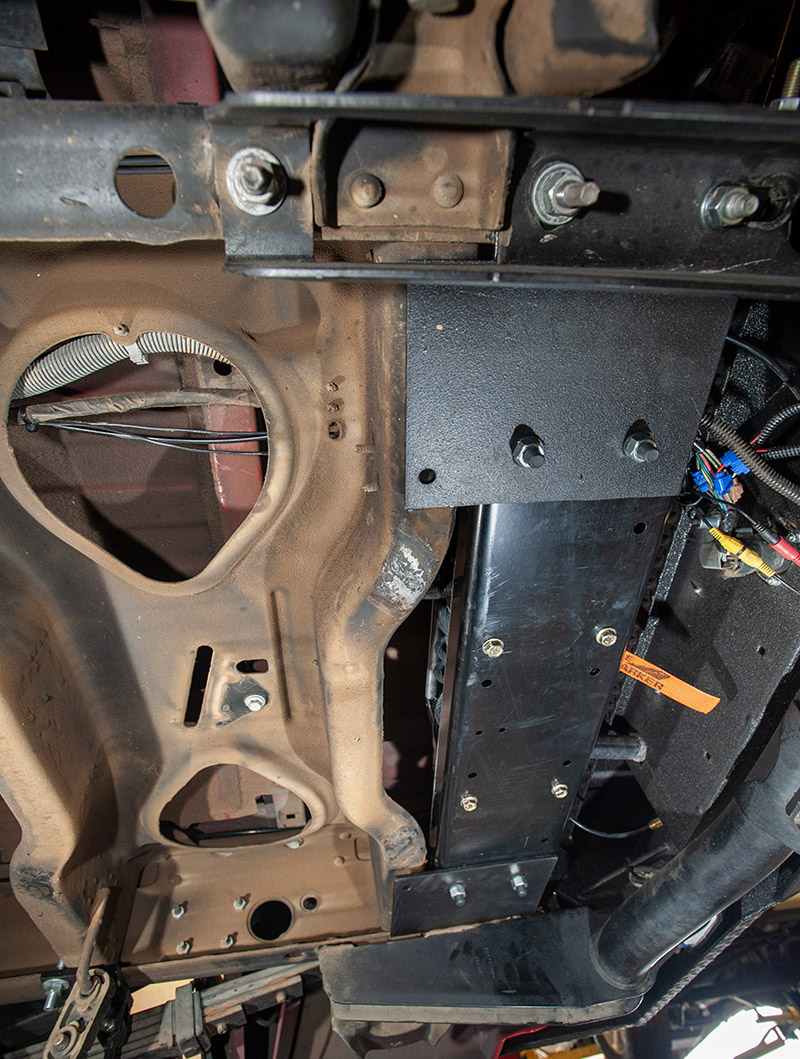
Use floor jack to lift and center the rear winch assembly into place so each extension mounting plate is located between factory receiver hitch brackets and frame. Re-install hitch-mounting bolts through the plates and hitch frame brackets. Drill a new hole in each plate so a third bolt can be used to secure it to the rear of the spare tire crossmember.
The installation and fabrication of parts really isn’t that difficult when you slide under the truck and look at what needs to be done.
The winch control box also needs to be relocated so it sits alongside the winch or, as we did, in the rear bumper. Using a wireless winch control works great in this application. We ran a single battery cable inside the driver’s-side frame rail to bring power directly from the batteries under the hood to the winch control box.
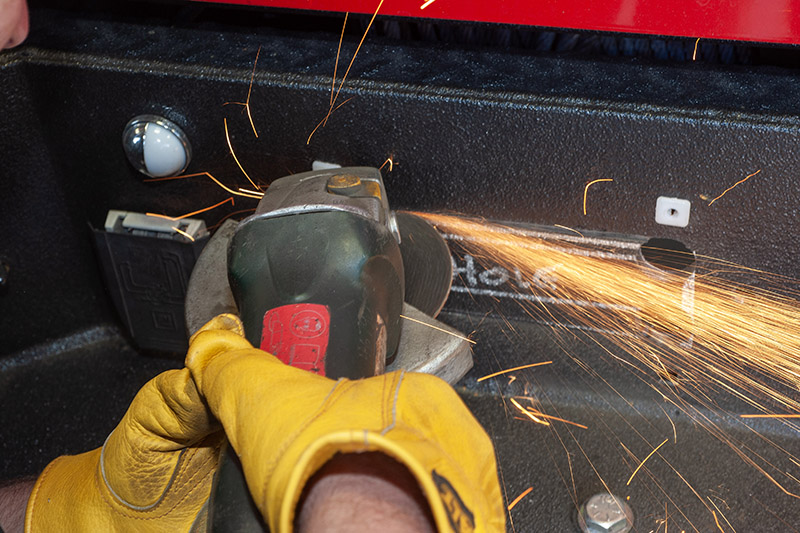
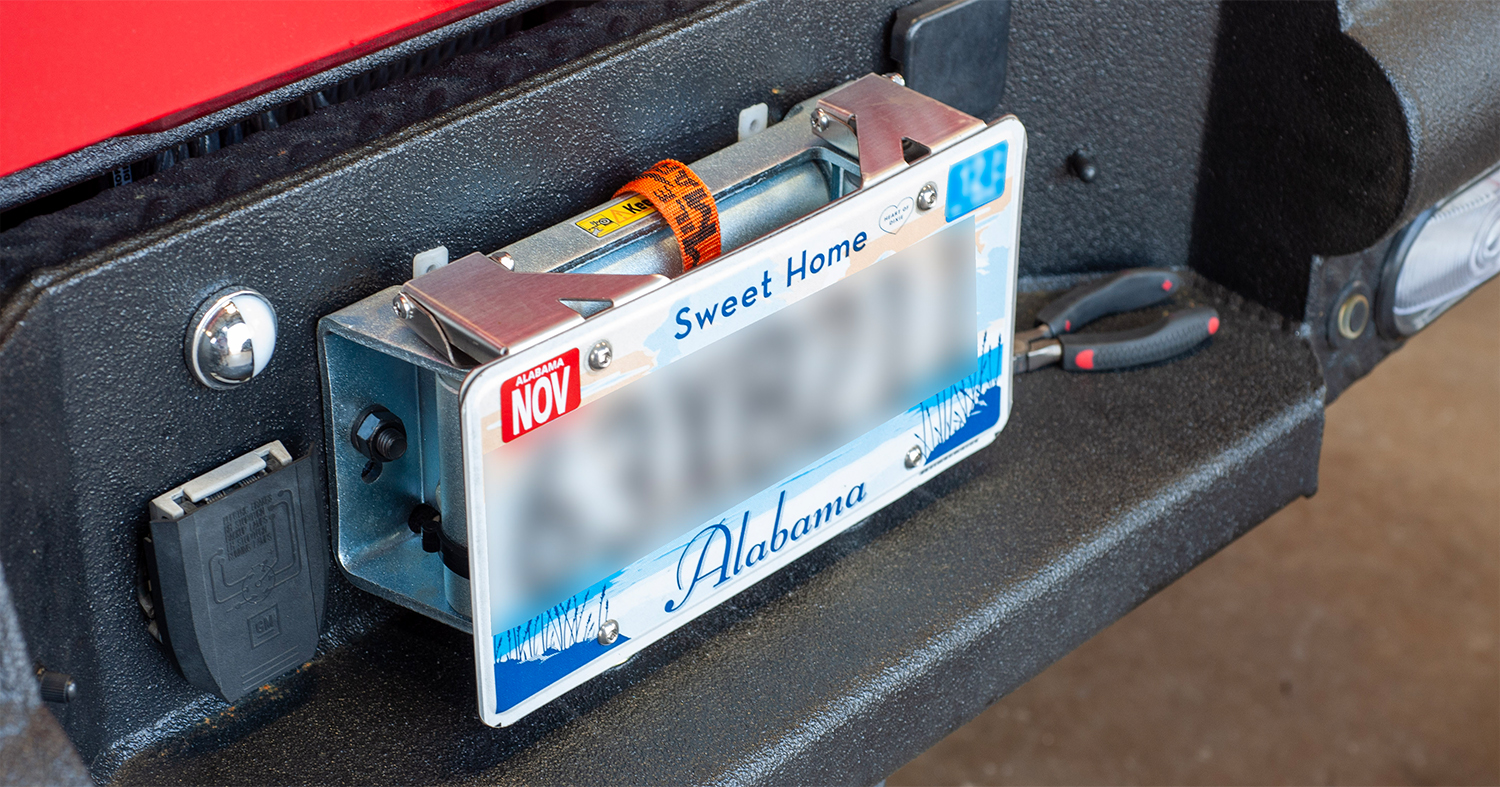
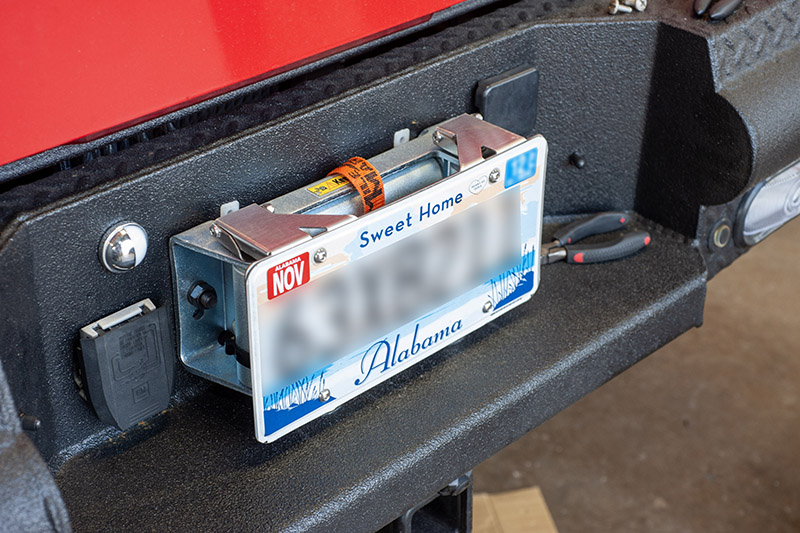
The last step is to cut out the opening in the rear bumper behind the OEM license plate to accommodate the roller-type fairlead. Treat fresh cut edges with rust-preventive paint/sealer.
Mounting the fairlead requires cutting an opening in the rear bumper for the winch cable to exit behind where the license plate normally sits, and drilling holes to bolt on the roller fairlead.
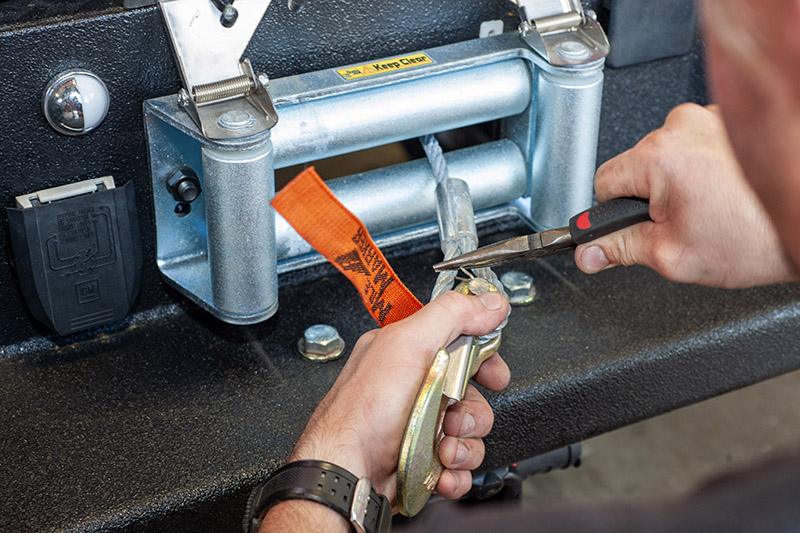
Mount fairlead. Mount flip-up license plate holder. Run winch cable through fairlead and install hook. Double-check that all mounting hardware is tight and electrical connections are secure.
Then we used a flip-up license plate holder from Tuffy that attaches to the fairlead to keep the truck street legal.

OutdoorX4 – Promoting responsible vehicle-based adventure travel and outdoors adventure